My mother taught me to make bread when I was a teenager. I hated the task, because it was required of me, but I did it, because it was expected of me. We made four loaves at a time--as much as our large mixer could hold--and our family of eleven went through them in about two days.
Somehow, baking for your own family is more rewarding than baking because you are required to do so as a teenager. My husband and kids turn up their noses at regular "store-bought" sliced bread and only want sandwiches when they are made with homemade bread. (They'll tolerate store-bought specialty rolls.) They are so spoiled . . . good thing I love 'em . . .
My Kitchenaid mixer will only hold enough dough for two loaves, so I cannot be quite as productive as my mother. And, like most kids, I have created variations on her bread, adjusting it to my personal taste. So I'll include both the recipe she gave me and the variation I usually make. (Both recipes are scaled for two loaves.)
My Mother's Recipe
1/2 cup lukewarm water
1 1/2 Tablespoons yeast
2 Tablespoons sugar
2 cups water
1 Tablespoon salt
2 Tablespoons vegetable oil
Flour (About 6 cups. If you want, you can make 2 of those cups whole wheat flour.)
My Variation
1/2 cup lukewarm water
1 Tablespoon yeast (The yeast I use will leave a very yeast-y flavor if I add more.)
2-3 Tablespoons sugar
2 cups water or whey, if I have it after making paneer, a fresh cheese (aka queso fresco)
1 Tablespoon salt
3 Tablespoons vegetable oil
Flour (About 6 cups. I am very variable when it comes to flour. I've used part whole wheat, as my mother has, or I've ground spelt and used it in place of the whole wheat, or I've added a half cup milled flax seed. I've also added oat flour ground from oat groats, but this has to be done sparingly, as there is no gluten. I haven't yet tried making gluten-free products, so I don't have any of that gluten stuff to add in and have to depend on the gluten I get from my flours.)
The wonderful thing about this bread is, as my kids would say, it is not "rocket science". In our family, saying a recipe is "rocket science" means there is not much margin for error or variation. (You'd better follow it closely, or it won't turn out right.) This bread is most definitely not "rocket science". If you want to add powdered milk or an egg, just for giggles, or to experiment with textures, go ahead. It will turn out just fine. I've done it.
Here are the ingredients I gathered this time around. The container in the front holds whey, left over from my cheese-making a few days earlier. (Never waste whey, if you have it. It's good for you.) The container in the center back is whole wheat flour I ground with my Kitchenaid grain mill attachment. I keep my yeast in a canning jar in the freezer. (The Master Kitchen Helper in the background is not necessary, but having one makes baking more fun.)

You may wonder why the liquids have been divided in the recipe. The half cup of lukewarm water is for dissolving the yeast and sugar. Remember, Success in bread recipes with yeast is all about temperature. If the water you use is too hot, it will kill your yeast, but if the water is too cold, you will be waiting forever for your dough to rise. (Long rising is actually used in some recipes, but not in this one.) The water should be lukewarm, just a touch over your body temperature, roughly 110 degrees Fahrenheit. If you take a dry finger and put it in the water, it should feel ever-so-slightly warm, but not bathwater warm.
Put the yeast and sugar into the lukewarm water and stir gently, then leave it for about five minutes.
In the mean time, go ahead and add the salt and about two cups of flour (I start with the whole wheat) to the mixer bowl. Add the 2 cups of water (or whey, or milk) and start stirring. (You can use a medium speed on the mixer at this point.) Add a cup of white flour, and continue to stir. This is about how it will look at this point:

Now is the time to add the yeast mixture to the mixer. (And keep mixing . . .) Continue to add flour until the dough forms a nice ball which has mostly cleaned up the sides of the mixer.

After kneading at a lower speed, add a touch of oil to the bowl, just to grease it, and stop the mixer. Swirl the dough around in the bowl to make sure it's nicely greased, then turn the dough upside down, greased side up. Cover and let rise until about doubled in size, about a half hour for this recipe with a decently warm kitchen. (For a more detailed explanation of the basics of stand mixing the dough and rising, see Mixing a Yeast Bread In a Stand Mixer.)

When the dough has finished rising, prepare a work surface with a little flour and grease two loaf pans with shortening. (My pans are 8"x4". . . . Here is everything all ready, with the risen dough.)
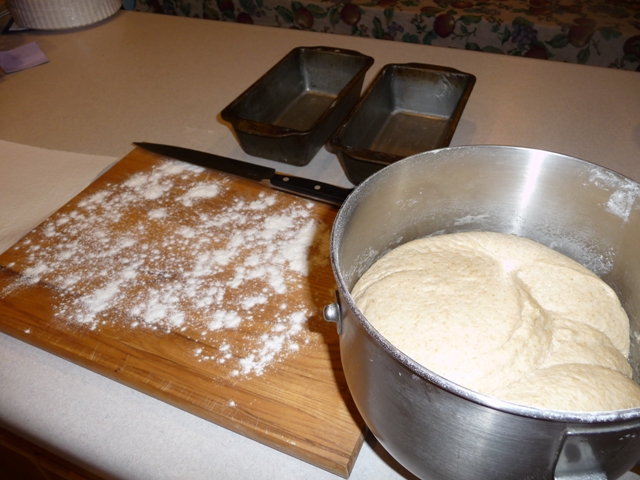
Because this is enough dough for two loaves, it needs to be split before it can be shaped. A sharp knife will do the trick. Really good bakers would use a scale to make sure the dough has been evenly split, but my method is somewhat more low-tech. I take a ball of dough in each hand and see if they are about equal . . . (Yes, this means that frequently, I have one loaf a bit bigger than the other. They still taste good.) If the divided dough is uneven, just take a pinch from one and stuff it into the other one.

Many people shape loaves by flattening them, then rolling up the dough. I've done it before, and if you want to keep it simple, go ahead. But my usual method isn't quite as pretty. I tend to flatten the loaves a bit with my hands (spread them out a bit--no rolling pins here) into a sort of rectangle, then take the long sides, bring them together, and pinch. Then I move to each end, bring the sides of a single end together, and pinch. (Same on the other end.) It's easy to do, but difficult to describe, and even more difficult to photograph while you are doing it. Here's what it looks like when it's done:

When I want to put it in the loaf pan, I take hold of it by the pinched-up part, turn it upside down, and put it in the pan.
Now the loaves must rise in their pans, again, about a half hour, but sometimes less. This is a good time to preheat the oven to 400 degrees Fahrenheit, which can serve double-duty by making a warmer place for the loaves to rise. (Caution: do not put them where the oven can vent directly on them. It can cause drying in spots of the dough.) When the dough is peeking above the tops of the pans, but not enormously above the tops of the pans, the loaves are ready to be baked.

Bake the loaves at 400 degrees Fahrenheit for about 25 minutes. Keep them in a position roughly centered in the oven while baking. (Trust me . . . if they are too close to the top, the tops will get overly brown, while the bottoms will be too light.)

When they are done, they should be nicely browned on the top and sound somewhat hollow when tapped. Remove them from the oven and from their pans. They can be cooled on their sides either on a clean dishtowel, a paper towel, or a baking rack. (If you leave them too long on their sides on a baking rack, they will have nicely indented lines. If you do not want lines, it's probably better to cool them on a paper towel or something.) When the loaves have cooled for a while, it is a good idea to stand them up.

You can cut it when it is still warm, but it is more difficult, and the slices will need to be thicker to avoid having them break apart. For best results, wait until it is completely cooled to slice. (If you can stand it with all those tempting aromas . . .)
This bread makes great sandwiches, tasty toast, or just plain good eating. Thanks, Mom!!
No comments:
Post a Comment