Showing posts with label Traditions. Show all posts

Sunday, March 25, 2012

Irish Soda Bread

I had every intention of making soda bread the week before St. Patrick's Day, just for this blog. But, as they say, "the best-laid plans of mice and men . . ."

The night before I planned on baking, I received notification I would be required to travel for work. Not only would this mean I would be too busy to do any baking the next day, it meant I would be away for Pi Day (3/14) and St. Patrick's Day. (And I already had my corned beef in the refrigerator . . .)

Grrrrrrr.

I first made Irish Soda Bread some years ago, when I discovered exactly how delicious corned beef turned out when cooked for a long time in a crock-pot. I found a simple recipe on Allrecipes.com which I have successfully used for years. Usually, I just make it for my family, but once, I was called upon to make it for about 50 people, when my employer scheduled an employee social event around St. Patrick's Day. (The Mexican ladies working in the kitchen at the time, who are excellent cooks, felt a little uncomfortable when it came to baking this unfamiliar recipe, so I helped them out. They loved it and took home the leftovers.)

The recipe calls for buttermilk, but the standard "sour milk" substitution using milk and vinegar works so well, I don't see the need to purchase buttermilk specifically for this recipe.

From my trusty Better Homes and Gardens Cookbook . . .


For each cup of buttermilk, mix 1 Tablespoon of vinegar (or lemon juice) with enough milk to make 1 cup total.  Stir it and let it sit for at least 5 minutes before using in the recipe.


Ingredients:

4 cups all-purpose flour
4 Tablespoons white sugar (This is 1/4 cup, if you want to make it easier.)
1 teaspoon baking soda
1 Tablespoon baking powder
1/2 teaspoon salt
1/2 cup margarine, softened
1 cup buttermilk or sour milk
1 egg

1/4 cup butter, melted
1/4 cup buttermilk or sour milk

Preheat the oven to 375 degrees Fahrenheit and lightly grease a large baking sheet.

In a large bowl, mix together the dry ingredients, then add the margarine.  With the margarine softened, I usually just cut it in with a whisk, but rubbing it with fingers should work, as well, if you prefer that mixing method.

Stir in the 1 cup buttermilk (sour milk) and the egg.  I usually use a fork to mix this mixture, just as I do for biscuits.

A note about making this in a desert:  I usually need more than 1 cup of sour milk to make this work.  If I use only a cup, I end up with a very, very crumbly dough which doesn't want to stick together at all.  Adding about another quarter cup makes it all stick together better without becoming actually sticky.


Turn the dough out on a lightly floured surface and knead slightly.  Form it into a round and place it on the greased baking sheet.  I like to make mine a little flatter, rather than rounder on the top, because I like the results better.

With a sharp knife, cut an "X" into the top of the loaf.


Combine the 1/4 cup melted butter and a 1/4 cup buttermilk (sour milk); brush the loaf with this mixture.


Bake in the preheated oven for 45-50 minutes or until a toothpick inserted into the center of the loaf comes out clean.  I usually brush the loaf with the butter mixture about every 15 minutes in the baking process.


And there you have it!  A lovely, crusty loaf of dense bread.  The outside will have a tendency to crumble off if you slice it too warm, so it's a good idea to give it some cooling time before starting to slice.


By the way, we did have our St. Patrick's Day dinner at home, just about a week late.  And I did end up eating pie on Pi Day . . . taking advantage of Village Inn's "free pie on Wednesdays" special.  (Luckily, the 14th was on a Wednesday!)  And . . . we learned never, never to travel to Orlando on business during Spring Break . . .

Thursday, November 24, 2011

Holiday Crescent Rolls

Crescent rolls at holidays is a long-standing tradition in my family.  While I didn't like being assigned to make "normal bread" as a teenager, I would raise my hand to make the crescent rolls at Thanksgiving and Christmas.  Seeing they had a willing vict- . . . I mean volunteer in the family, the rest of the family usually stepped aside and let me do it.  (They tossed in a little flattery to make sure I would continue to want to take on the task . . . either that, or they actually liked the way I made them.)

I've continued this tradition in my own family.  It's a good recipe for Master Kitchen Helpers or Kitchen Artistes in Training to help in the shaping, as it involves painting butter with a brush, dividing circles with a pizza cutter, and rolling triangles of dough before putting them on baking sheets.  All sorts of fun to be had which doesn't require a lot of precision.  (I mean all sorts . . . especially since we double the recipe, which is the maximum my stand mixer can handle at a time.)

This time, I had my Kitchen Artiste in Training helping me, but by the end, the Master Kitchen Helper and the Junior Taste-Tester had also joined us.  Everyone wanted to get in on the fun.

Pretty basic ingredients.

Ingredients:

3/4 cup milk
1/4 cup sugar
2 1/4 teaspoon salt
4 1/2 Tablespoon shortening
3/4 cup lukewarm water for yeast
1 Tablespoon yeast (with mine, a little less)
4 1/2 cups flour (Well, you know how flour in yeast dough recipes goes . . . probably a bit more than this.)
Butter for brushing.  (You can use margarine if you want.)

Scald the milk (can be done in the microwave--makes life easy) and stir in the sugar, salt, and shortening.  Cool the mixture to lukewarm.  (The shortening does not have to melt.)


Mix the yeast in the lukewarm water and allow it to sit for about 5 minutes until dissolved.

If you are using a stand mixer with a bread hook, mix it all together as in Mixing a Yeast Bread in a Stand Mixer.  I start by putting in about 3 cups of the flour, then adding the milk mixture.  After it has mixed somewhat, I add the yeast mixture and continue with the flour until the dough is cleaning up the sides of the mixer bowl.  Then I drizzle oil into the bowl, allow the bread hook to carry the dough around the bowl a couple of times, then stop it, remove the bread hook, and flip the dough over.

If you do not have a stand mixer, start with the yeast water in your bowl, then add the milk mixture, and add half of the flour.  Beat it until smooth, then add the rest of the flour.  Turn out the dough onto a lightly floured board and knead until smooth and elastic.  Then place the kneaded dough into a greased bowl and brush with shortening.  (I've never done that . . . place the kneaded dough into a well-oiled bowl, twirl it around a couple of times so the dough on the bottom gets nicely oiled, then flip it so the oiled side is on the top.  Who wants to mess with brushing shortening when this is so much easier?)

Cover the dough and let it rise in a warm place until doubled, about one hour.  Punch down the dough and turn it out on a lightly floured board.  Divide the dough into three equal pieces.

I suppose I should weigh these, especially as they are thirds.


Roll pieces (one at a time, of course, or you'll run out of room on your board, unless you have a very, very large board) into circles about 9 inches in diameter.  (Mine always end up larger.  Remember as you roll, the elastic dough will try to shrink, so you'll have to roll them larger if you want them to end up with 9-inch diameters.)

Brush with melted margarine (No way!!  Butter!!).


Cut into 8 pie-shaped wedges.  A pizza cutter is an excellent tool here, but only if you roll your dough out on a board, instead of the counter.


Roll up tightly and seal the points.


Place on greased baking sheets, with the points underneath, about 2 inches apart.  Curve each roll to form crescents.  (We don't curve them very much, but it works.)

Cover and let rise until doubled.  (About an hour . . . if you find yourself a nice warm spot, it might be less.  I always shoot for a half hour if I can help it.)  Brush with melted margarine (Butter!!) on the tops.


Bake in an oven which has been preheated to 400 degrees Fahrenheit for about 13-15 minutes.


Because I end up with so much help, my crescent rolls rarely turn out with the most beautiful shapes.  But the fun we have, dancing in the kitchen to Pandora stations while taking turns in the shaping process, outweighs any desire I have for picture-perfect rolls.  After all, the true value of holiday traditions is the time spent together and the memories made as families.

Fluffy!!

Friday, October 7, 2011

Cinnamon Roll Goodness!

Cinnamon rolls are a guilty pleasure I almost never take the time to make.  For a while, I didn't make them at all, because my recipes came out rather dry, not soft and chewy, as I prefer them.  Then I visited my sister and ate some of hers . . .

Yum!!!

She has a bread machine, which I stubbornly refuse to purchase, in which she mixes her dough, but the shaping, of course, has to be done by hand.  I figured the recipe would work just as well mixed in my Kitchenaid mixer, so I persuaded her to share it with me.

I haven't been disappointed yet.  /licks fingers

I still make them infrequently, but they have been incorporated into our family traditions.  Twice a year, when our church holds its general conference sessions in April and October, broadcast over the Internet, satellite, etc., I make them for Sunday morning breakfast.

(Ok, so I make them Saturday night, because I don't want to get up early in the morning for a yeast dough . . .)

So here is my sister's recipe:

Cinnamon Rolls

1 cup water
1 large egg
3 1/4 cups bread flour (I use all-purpose, but I can't tell you the exact quantity, because I use a mixer.)
1/4 cup sugar
1 tsp. salt
3 Tbsp. dry milk
1/4 cup butter
1 1/2 tsp. active dry yeast (My brand of yeast starts to taste really "yeasty" if I put in as much as most recipes call for, so I only used 1 tsp.  Get to know your yeast; it really makes a big difference.)

(You will need more butter, brown sugar, and cinnamon later on, so get them out, but ignore them for the time being.)

Her recipe tells me to add it to a bread machine (*ack*, *gag*) and select the dough cycle.  My method is a little different . . .

As a side note, I've got to tell you about what ended up being the best bridal shower gift ever.  Here it is:


Yes, that really is a composition notebook with contact paper on it.  Inside were a few favorite family recipes from the sweet lady who prepared this book.  Since that time, I have written or pasted myriad recipes on its pages, numbering the pages and noting in the back of the book where everything is by food category.  Here is the page with the cinnamon rolls:

Obviously, there are some favorite recipes on those pages . . .

Anyway, gather the ingredients and prepare to begin . . .


Yes, I buy store brands whenever possible.  Luckily for me, most breads I have made so far are not that picky.  The canning jar contains my yeast, which I store in the freezer.  In this way, I can be reasonably sure it is still good when I want to use it.

Success in bread recipes with yeast is all about temperature.  If the water you use is too hot, it will kill your yeast, but if the water is too cold, you will be waiting forever for your dough to rise.  (Long rising is actually used in some recipes, but not in this one.)  The water should be lukewarm, just a touch over your body temperature, roughly 110 degrees Fahrenheit.  If you take a dry finger and put it in the water, it should feel ever-so-slightly warm, but not bathwater warm.

Dissolve your yeast in the lukewarm water.  This can be done either in a cup or in the mixer, such as I did this time.


After the yeast is dissolved, start adding the other ingredients, except the flour.  If you intend to use the bread hook throughout the process, as I did, I highly suggest beating the egg before adding it.

Mix and start adding the flour.  The first cup can pretty much be added all at once.  After that . . . be a little more careful.  The dough will progress to something like this:


As more flour is added, the dough will start to make more of a ball around the hook, while still sticking to the bottom of the bowl.  At this point, keep adding flour, but only do it a little at a time--just enough to persuade the dough to stop sticking to the bottom of the bowl and clean up the sides a bit.  Finally, you will end up with something like this:


At this stage, tap flour a little at a time to keep the ball of dough from sticking while you allow the dough to knead, roughly five minutes or so.

Turn the mixer to the lowest speed, drizzle a little vegetable oil down the inside of the bowl, and allow the ball of dough to move around the bowl one or two times.  Stop the mixer, remove the bread hook from the machine, and scrape (with your fingers--it's easier that way) the dough down off the dough hook.  Twirl the ball of dough to evenly spread the oil around and turn it upside down, so the greased side of the dough is up.

Time to rise:


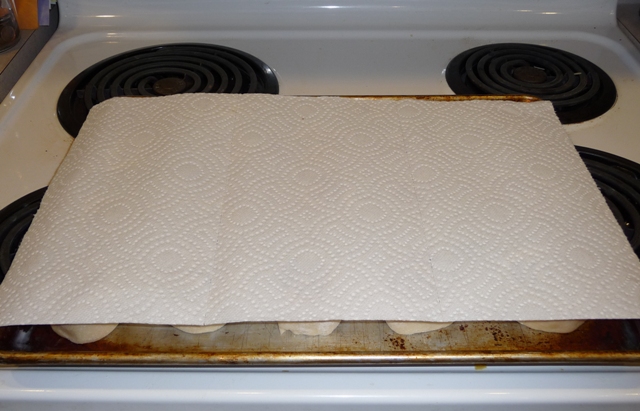
Cover the bowl with paper towels or a very clean dishtowel, and walk away.  Check back in about an hour, or if the room is warmer, perhaps a little sooner.  You want the dough to about double in size.


After the dough has risen, prepare your working surface by sprinkling it with flour.


Now it's time for that more butter, brown sugar, and cinnamon.  Melt the butter (I do it in the microwave) and mix 1/2 cup brown sugar with 1/2 Tbsp. cinnamon.  (You can add more cinnamon if you want it more spicy.)

Turn your dough out on the floured board and roll it in a long rectangle (about 8-9 inches by 16-18 inches).  Spread the melted butter on the dough and sprinkle on the cinnamon-brown sugar mixture.


Roll the dough from the long end.


(Obviously, I need a bigger board . . .)

Cut the rolled dough into 1 to 1 1/4 inch rolls.


Spray a large baking sheet with nonstick spray or grease it with shortening.  Place the rolls on the baking sheet, about 2 inches apart.


Cover the tray lightly with a damp towel (or paper towels) and allow the rolls to rise in a warm place about 45 minutes or until they've doubled in size.  (I rise them on the stove and turn on the oven to a low temperature, then preheat it as the rolls get closer to the end of their rising time.  Just make sure the tray is not sitting on top of the unit which vents the oven.  Bad idea.)


The rolls should be baked at 375 degrees Fahrenheit for 12-13 minutes or until very lightly browned.


Here they are!  After they have cooled, they can be iced, but I prefer to drizzle a simple glaze over them while they are still warm (but not hot).  The glaze is made with 1 cup powdered sugar, 2 Tablespoons milk, and about a half teaspoon of vanilla.  Simple--mix it up and drizzle over the rolls.


Yum, yum . . . The glaze adds just the right amount of sweetness.  Sit back and watch the rolls disappear!


The Bread My Mother Taught Me

. . . or, as my 10-yr-old calls it, "Normal bread."

My mother taught me to make bread when I was a teenager.  I hated the task, because it was required of me, but I did it, because it was expected of me.  We made four loaves at a time--as much as our large mixer could hold--and our family of eleven went through them in about two days.

Somehow, baking for your own family is more rewarding than baking because you are required to do so as a teenager.  My husband and kids turn up their noses at regular "store-bought" sliced bread and only want sandwiches when they are made with homemade bread.  (They'll tolerate store-bought specialty rolls.)  They are so spoiled . . . good thing I love 'em . . .

My Kitchenaid mixer will only hold enough dough for two loaves, so I cannot be quite as productive as my mother.  And, like most kids, I have created variations on her bread, adjusting it to my personal taste.  So I'll include both the recipe she gave me and the variation I usually make.  (Both recipes are scaled for two loaves.)

My Mother's Recipe

1/2 cup lukewarm water
1 1/2 Tablespoons yeast
2 Tablespoons sugar

2 cups water
1 Tablespoon salt
2 Tablespoons vegetable oil
Flour (About 6 cups.  If you want, you can make 2 of those cups whole wheat flour.)

My Variation

1/2 cup lukewarm water
1 Tablespoon yeast  (The yeast I use will leave a very yeast-y flavor if I add more.)
2-3 Tablespoons sugar

2 cups water or whey, if I have it after making paneer, a fresh cheese (aka queso fresco)
1 Tablespoon salt
3 Tablespoons vegetable oil
Flour (About 6 cups.  I am very variable when it comes to flour.  I've used part whole wheat, as my mother has, or I've ground spelt and used it in place of the whole wheat, or I've added a half cup milled flax seed.  I've also added oat flour ground from oat groats, but this has to be done sparingly, as there is no gluten.  I haven't yet tried making gluten-free products, so I don't have any of that gluten stuff to add in and have to depend on the gluten I get from my flours.)

The wonderful thing about this bread is, as my kids would say, it is not "rocket science".  In our family, saying a recipe is "rocket science" means there is not much margin for error or variation.  (You'd better follow it closely, or it won't turn out right.)  This bread is most definitely not "rocket science".  If you want to add powdered milk or an egg, just for giggles, or to experiment with textures, go ahead.  It will turn out just fine.  I've done it.

Here are the ingredients I gathered this time around.  The container in the front holds whey, left over from my cheese-making a few days earlier.  (Never waste whey, if you have it.  It's good for you.)  The container in the center back is whole wheat flour I ground with my Kitchenaid grain mill attachment.  I keep my yeast in a canning jar in the freezer.  (The Master Kitchen Helper in the background is not necessary, but having one makes baking more fun.)


You may wonder why the liquids have been divided in the recipe.  The half cup of lukewarm water is for dissolving the yeast and sugar.  Remember, Success in bread recipes with yeast is all about temperature.  If the water you use is too hot, it will kill your yeast, but if the water is too cold, you will be waiting forever for your dough to rise.  (Long rising is actually used in some recipes, but not in this one.)  The water should be lukewarm, just a touch over your body temperature, roughly 110 degrees Fahrenheit.  If you take a dry finger and put it in the water, it should feel ever-so-slightly warm, but not bathwater warm.

Put the yeast and sugar into the lukewarm water and stir gently, then leave it for about five minutes. 

In the mean time, go ahead and add the salt and about two cups of flour (I start with the whole wheat) to the mixer bowl.  Add the 2 cups of water (or whey, or milk) and start stirring.  (You can use a medium speed on the mixer at this point.)  Add a cup of white flour, and continue to stir.  This is about how it will look at this point:


Now is the time to add the yeast mixture to the mixer.  (And keep mixing . . .)  Continue to add flour until the dough forms a nice ball which has mostly cleaned up the sides of the mixer.


After kneading at a lower speed, add a touch of oil to the bowl, just to grease it, and stop the mixer.  Swirl the dough around in the bowl to make sure it's nicely greased, then turn the dough upside down, greased side up.  Cover and let rise until about doubled in size, about a half hour for this recipe with a decently warm kitchen.  (For a more detailed explanation of the basics of stand mixing the dough and rising, see Mixing a Yeast Bread In a Stand Mixer.)


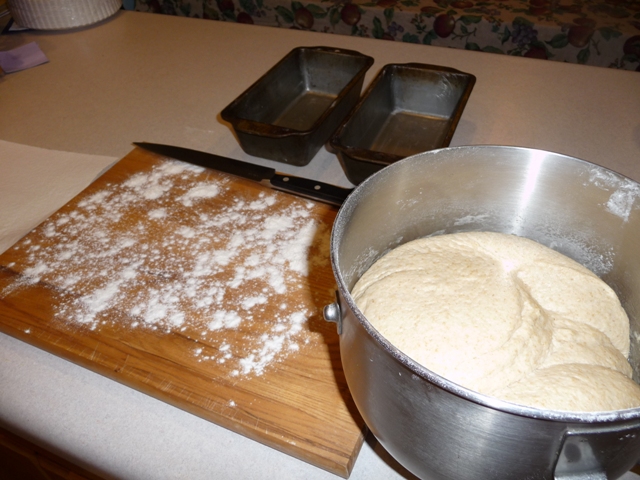
When the dough has finished rising, prepare a work surface with a little flour and grease two loaf pans with shortening.  (My pans are 8"x4". . . . Here is everything all ready, with the risen dough.)


Because this is enough dough for two loaves, it needs to be split before it can be shaped.  A sharp knife will do the trick.  Really good bakers would use a scale to make sure the dough has been evenly split, but my method is somewhat more low-tech.  I take a ball of dough in each hand and see if they are about equal . . . (Yes, this means that frequently, I have one loaf a bit bigger than the other.  They still taste good.)  If the divided dough is uneven, just take a pinch from one and stuff it into the other one.


Many people shape loaves by flattening them, then rolling up the dough.  I've done it before, and if you want to keep it simple, go ahead.  But my usual method isn't quite as pretty.  I tend to flatten the loaves a bit with my hands (spread them out a bit--no rolling pins here) into a sort of rectangle, then take the long sides, bring them together, and pinch.  Then I move to each end, bring the sides of a single end together, and pinch.  (Same on the other end.)  It's easy to do, but difficult to describe, and even more difficult to photograph while you are doing it.  Here's what it looks like when it's done:


When I want to put it in the loaf pan, I take hold of it by the pinched-up part, turn it upside down, and put it in the pan.

Now the loaves must rise in their pans, again, about a half hour, but sometimes less.  This is a good time to preheat the oven to 400 degrees Fahrenheit, which can serve double-duty by making a warmer place for the loaves to rise.  (Caution:  do not put them where the oven can vent directly on them.  It can cause drying in spots of the dough.)  When the dough is peeking above the tops of the pans, but not enormously above the tops of the pans, the loaves are ready to be baked.


Bake the loaves at 400 degrees Fahrenheit for about 25 minutes.  Keep them in a position roughly centered in the oven while baking.  (Trust me . . . if they are too close to the top, the tops will get overly brown, while the bottoms will be too light.)


When they are done, they should be nicely browned on the top and sound somewhat hollow when tapped.  Remove them from the oven and from their pans.  They can be cooled on their sides either on a clean dishtowel, a paper towel, or a baking rack.  (If you leave them too long on their sides on a baking rack, they will have nicely indented lines.  If you do not want lines, it's probably better to cool them on a paper towel or something.)  When the loaves have cooled for a while, it is a good idea to stand them up.


You can cut it when it is still warm, but it is more difficult, and the slices will need to be thicker to avoid having them break apart.  For best results, wait until it is completely cooled to slice.  (If you can stand it with all those tempting aromas . . .)

This bread makes great sandwiches, tasty toast, or just plain good eating.  Thanks, Mom!!